Tuesday, November 27, 2012

New JBJ ATO with Tom Aquatics dosing Pump


So I been getting several water evaporation, and it's a pain getting that 5gl jug over the tank to add water.

I decided to try one of those Auto Top Off system, there's so many out in the market ranging different prices.  Today I'll be focusing on the JBJ ATO, now I gotten several mix reviews that it's an okay item.  
This comes with 2 floater sensors and several brackets to adjust the height of the floater sensors, as well as     
2 suction cups.


I like the feature that you can set this up 2 ways.  The way I'll be setting up is with one floater sensor and as the pump i will be using the famous Tom Aquatics Aqualifter.. oooohhhh la la..


So I cut 2 pieces of 3 ft length on the flexible tubing, one to go into the Aqualifter and 1 ft length of the tubing that's going into the into the suction pre-filter. The remaining three feet goes from the suction pre-filter into the reservoir(in this case I'll be using a 5gl water jug)


Next Step is too mount the JBJ ATO, I mounted it next to my wavemaker.  The float sensor was placed with one bracket on the left chamber next to the protein skimmer.   I adjusted the height by cutting a small piece of 1/2" tubing and placing it under the bracket sitting firmly on the rim of the aquarium.  The output hose of the pump was run in between this 1/2" piece of tubing to hold it place and not to allow it to be in the water as this may cause a back flow siphon.


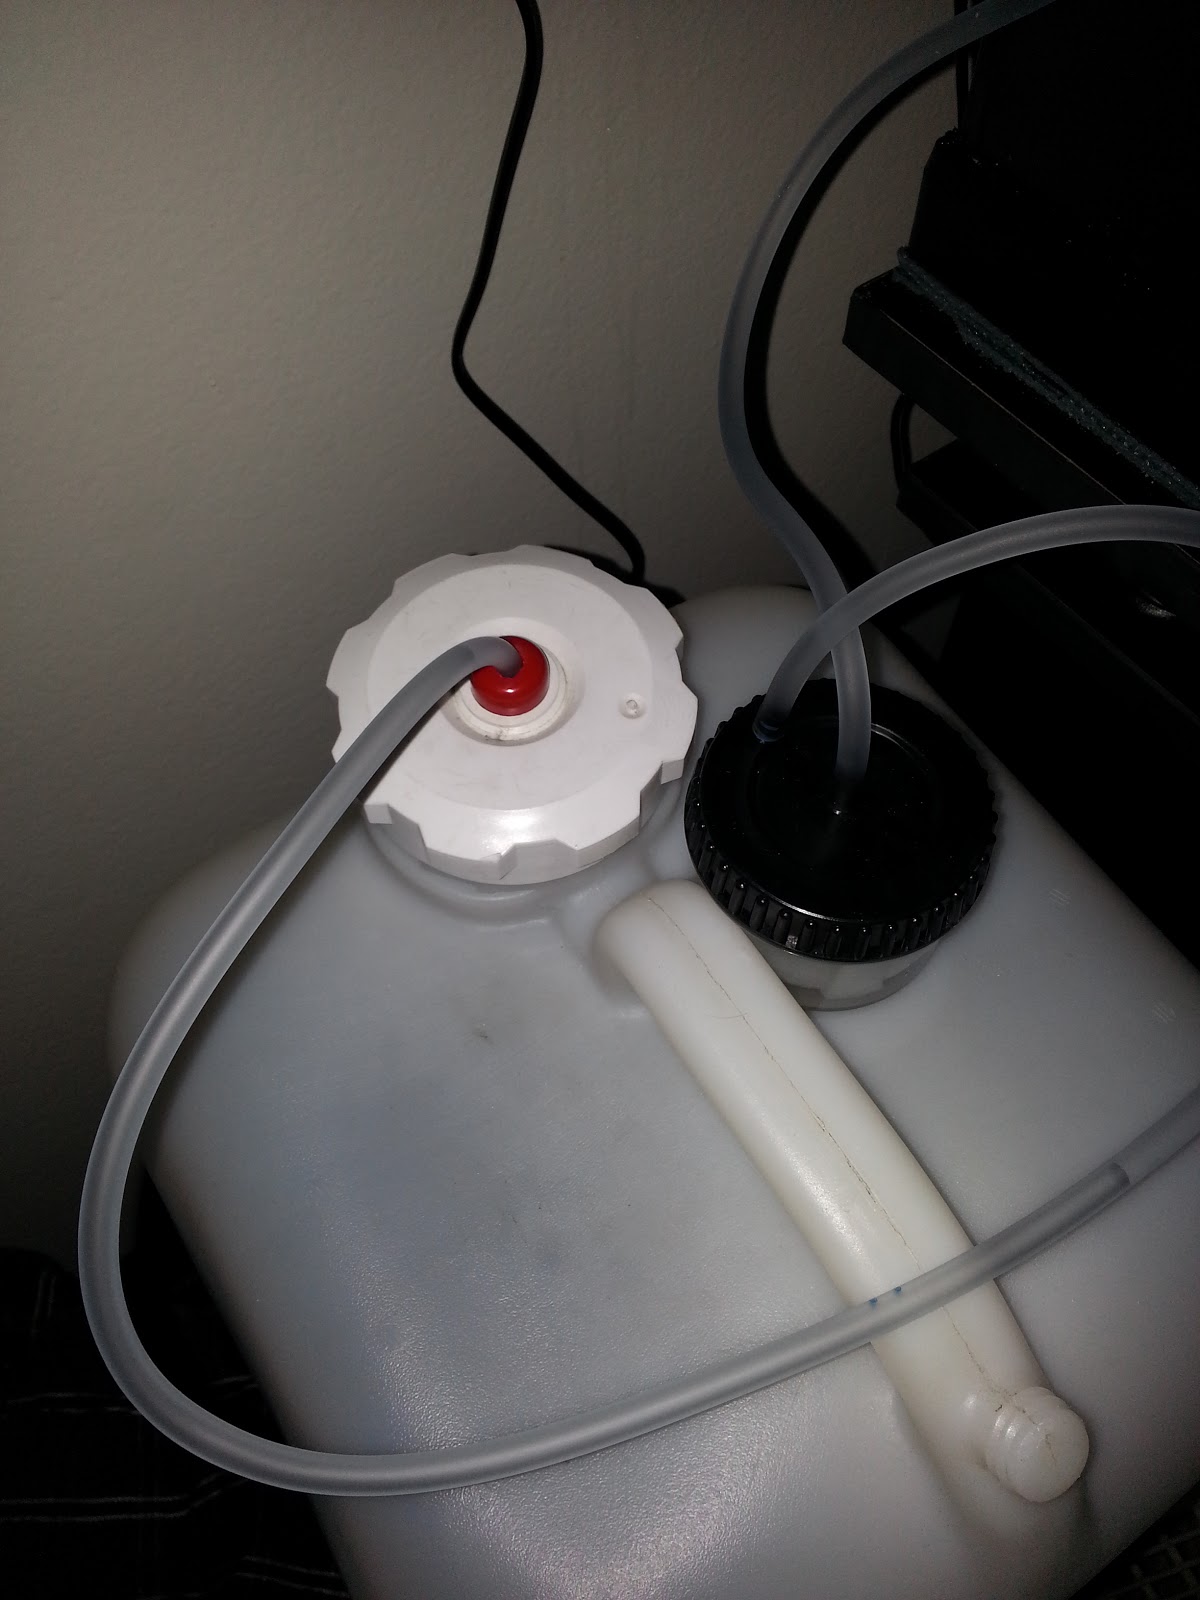
 After testing the system, the Aqualifter was mounted on a hook drilled to the wall at a level that would not affect the outcome of the water being pushed up.  The 5gl jug had a cap with a hole in the middle that was perfect to insert the flexible hose in and still keep it cover from any dust or any other contaminated particles that may affect the water.  I got an old test tube with a rubber cover that would slide perfectly in this hole.  All I had to do was make a small insertion for the flexible tubing to slide in.


It's been 2 days and so far the water level has been stable.

NPX screen replacement

so I got rid of my guetto screens cause they where catching to much debris and blocking the filter.  So I bought a set of the The Two Little Fishes NPX screens.  Once outside of the plastic seal I cut them to size from the original screen the media reactor had.  After trimming them to minor adjustments, they where able easily fit on the bottom and the top cap.  So no more debris and perfect flow going inside the reactor.


Friday, November 23, 2012

Another Sneak Peek

Tank update
Well these is week number 4, here is the progress so far.


Thursday, November 22, 2012

media reactor turned into a bio pellet

So I decided to try out this Media Reactor to see if it would work with bio pellets.  It comes with different filtration pads, 1/2" tube, and john guest fittings.  It looks pretty simple to install and pretty much plug and play.  


                                                          I drilled in 2 screws and made sure it would be leveled.  The John Guest fittings slip really easy to a 1/2" pump output.  The issue I was experiencing here is that I don't have enough space on my chamber to work with,  I placed the pump on the far right chamber, had to force it a little to make it fit.


After leveling the cap on the screws, the next step was to add the bio pellets.   I measured the amount with a measuring cup for 1/4 . I sealed it up and realized the screen is not enough to hold the pellets. Since I can't use the sponges I had to remove them.  I used some left over filter bag to cover the screens.


I placed the return hose on the protein skimmer chamber, I connected the pump and turned on the valve.  To my disappointment there was not enough flow to get the pellets to tumble.   The next thing was to upgrade to a higher pump.  I got the MJ 1200 and to my surprise the pump has a smaller footprint than the one I had connected to the reactor and not to mention more flow. I'm pretty satisfied with results. I dosed some micro bacteria to the pellets to speed up the process and now just have to wait a week to increase the bio pellets for 1/4 cup


Friday, November 16, 2012

MediaBaskets

Super excited about this product.  I used to owned the inTank mediabasket for the 12 gl nano dx.  It's a space saver in my chambers and not too mention is easier to maintain and clean.  Now all of you that have a JBJ 28 gl nano are going to say why do I need this if it comes with the 28 series.  Well my friends, as you can see the quality and craftsmanship on how this item is made speaks for itself.    

Comparing this two mediabasket side by side, you can tell by the nature of the material use.  It's build to fit snugly inside the chamber.  The inTank mediabasket has larger chambers to perfectly fit your media.  Both brackets and back wall force the water to go straight into and flow towards the middle.  No more water escaping on the sides or bouncing off to the back anymore.


I got all my basic media that's going to assist me on keeping this tank running to its top shape.  I got filter floss on 1st chamber, SeaChem Purigen on 2nd chamber, Chemi Pure Elite on 3rd chamber, and a little bit of seachem phosguard since I notice some hair algae(will only keep there for 3days).  I love the way the 3rd chamber is large enough for in the future if I want to rearrange my media, I can add chaeto and a submersible light. The sliding wall slides out easy to access your media.

So as you can see the bracket mounts on the back and fits perfectly, water is push straight down to pass through the middle.  It's easily accessible and slides out without no problem.  I have to say that Stevie T sure did a great quality job on this mediabasket.